

Redesigning a website comes with plenty of excitement—fresh design, better features, and improved user experience. But here’s the catch: many businesses experience a 60–70% drop in seo traffic after a site relaunch. Why? Because in the rush to launch, SEO often gets overlooked, causing businesses to lose hard-earned rankings and visibility.
One wrong move can destroy years of SEO work. Lost rankings mean lost customers and revenue.
The good news? You can avoid these costly mistakes with a proper website redesign SEO checklist. This blog shows you exactly how to redesign a website without losing SEO rankings.
We've broken down the process into 10 simple steps. Each protects your current search visibility while improving your site's performance.
Website Redesign SEO Checklist: 10 Tips to Keep Rankings Intact
A successful website redesign requires careful attention to SEO at every stage of the process. This comprehensive checklist covers 10 essential steps that will protect your current search rankings while improving your site's performance and user experience. From building the right team to ongoing post-launch monitoring, each step builds upon the previous one to ensure your redesign enhances rather than harms your SEO efforts. Follow this systematic approach to transform your website without losing the search visibility you've worked hard to achieve.

Step 1: Build Your SEO-Focused Redesign Team
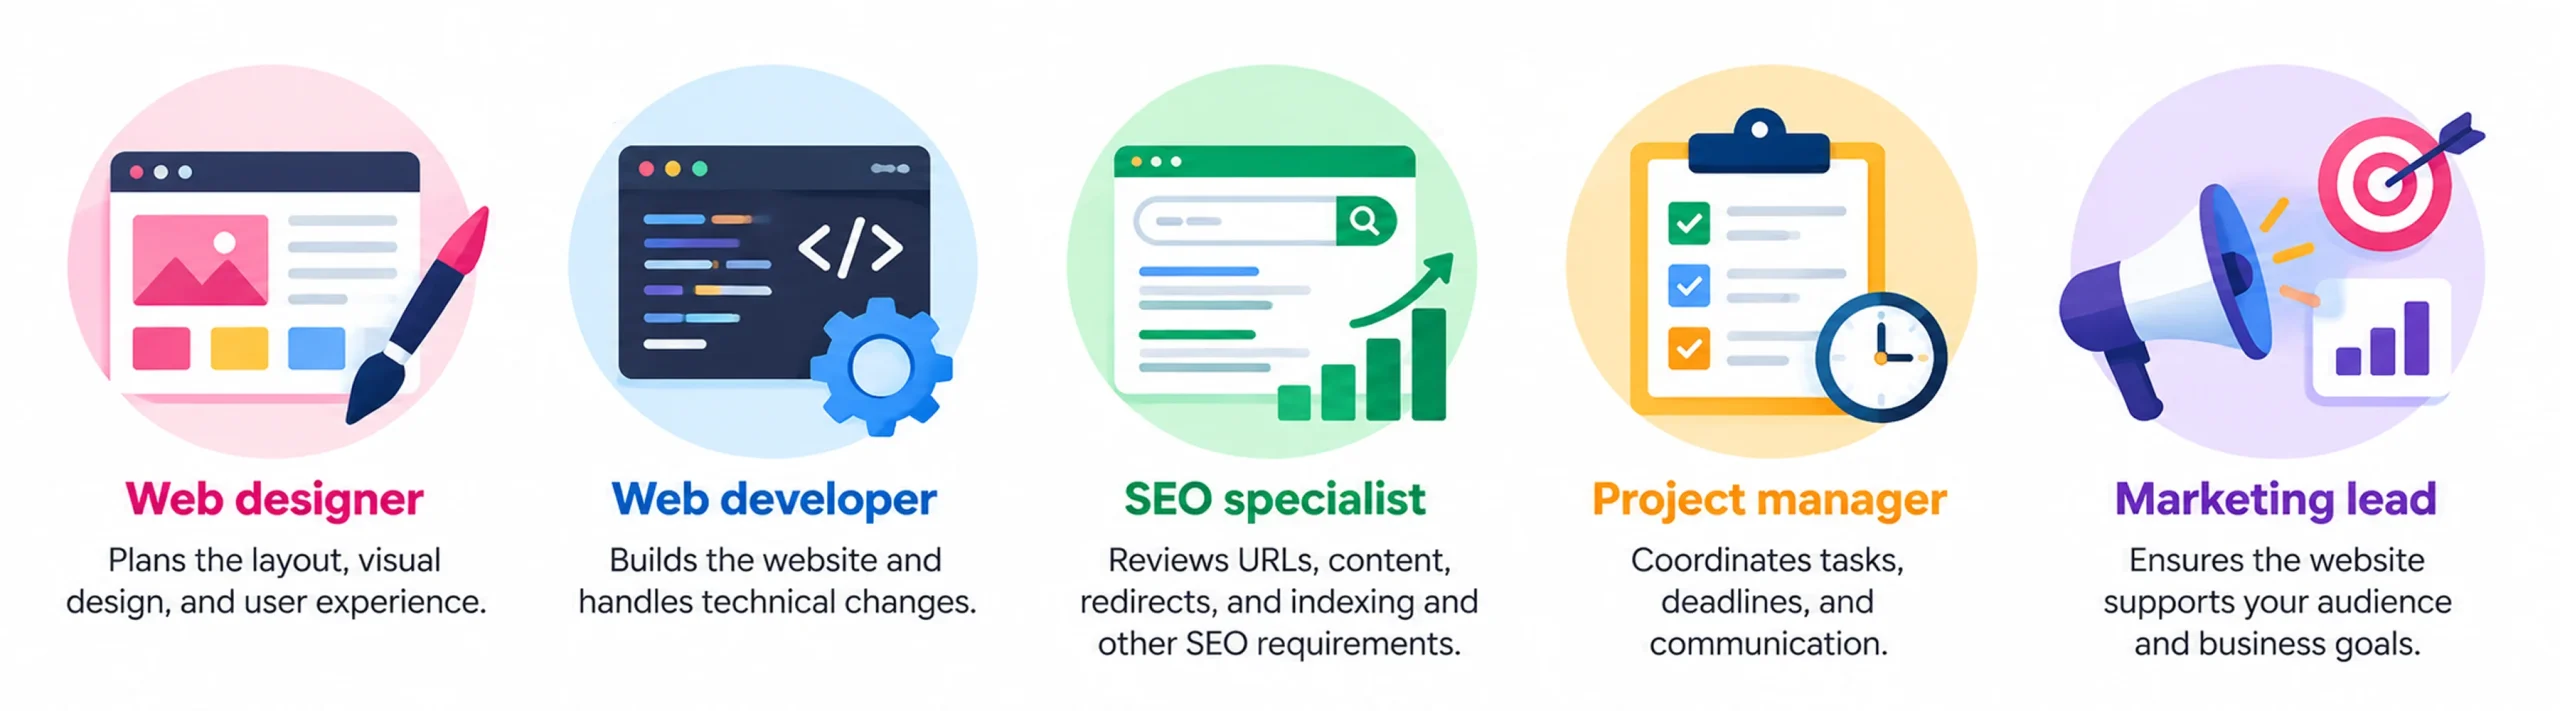
Your website redesign SEO success begins with assembling the right team from the start. Many businesses fall into the trap of involving only designers and developers, overlooking the critical role of an SEO specialist. The result? A visually impressive website that fails to attract organic traffic or generate visibility in search engines. By involving all these roles from the beginning, you set the foundation for a website that is not only visually appealing but also optimized for long-term growth and visibility. A strong redesign team should bring together professionals who understand both the creative and technical aspects of your website:

Key Team Members You Need:
- Web designer
- Web developer
- SEO specialist
- Project manager
- Marketing lead
Your SEO expert should be at the table from day one, not brought in as an afterthought. Their expertise helps prevent costly mistakes and ensures every design choice supports your visibility goals. Even something as small as switching an H2 to an H3 can negatively affect rankings, a detail designers may overlook but SEO professionals won’t. By having the right team in place early, you set the foundation for a redesign that not only looks great but also performs in search.
a. Choosing the Right Partner
If you're working with an agency, choose one that follows a structured site redesign SEO checklist. This ensures your new site not only looks modern and user-friendly but also maintains and improves its search engine rankings.
Pro Tip: Schedule your first team meeting before any design work begins. Make sure everyone understands the SEO requirements from your website redesign seo checklist.
This foundation helps you avoid up to 90% of common redesign SEO disasters, saving time, money, and lost rankings down the road.
Step 2: Document Your Current SEO Performance
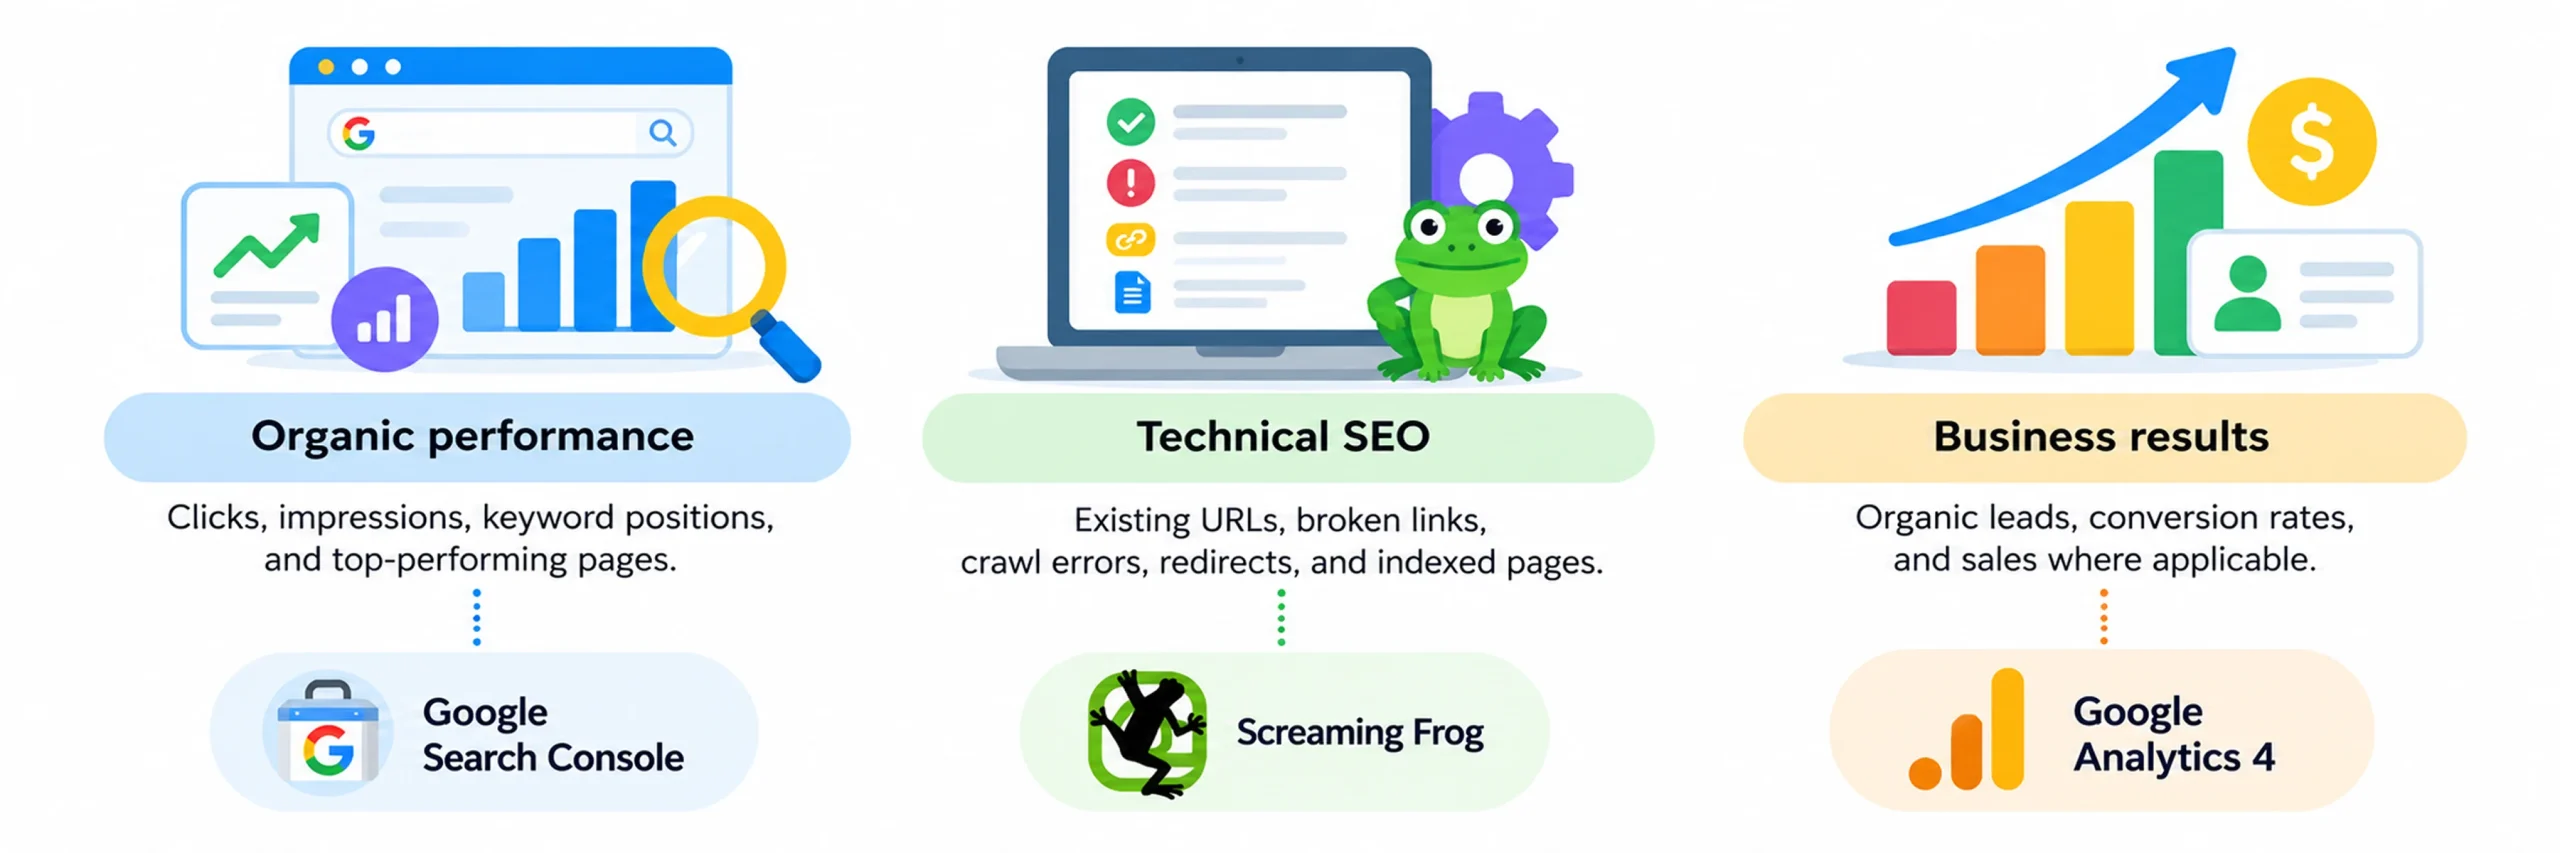
Before changing anything on your website, you need to document where you stand today. This baseline becomes your reference point for measuring success after the website redesign SEO project. It gives you a clear picture of your current strengths and weaknesses, showing which pages attract the most traffic, which keywords are driving visibility, and where performance gaps exist. By recording these insights now, you’ll be able to compare results post-launch with confidence. Without this data, it’s nearly impossible to know whether the redesign helped or harmed your SEO performance, leaving you to guess instead of making informed decisions.

a. Essential Metrics to Track
Before jumping into the redesign, it’s crucial to capture a snapshot of your current website performance. Think of it as your baseline report card. These metrics will help you measure whether your redesign improves SEO and business outcomes or unintentionally hurts them. Without this data, you’re essentially flying blind.
Traffic Data:
- Organic search traffic
- Top landing pages
- Monthly visitors
- Bounce rate
SEO Performance:
- Current keyword rankings
- Pages ranking in top 10
- Backlinks count
- Domain authority
Business Metrics:
- Lead generation numbers
- Conversion rates
- Revenue from organic traffic
b. Tools You'll Need
Use Google Analytics 4 and Google Search Console for basic data. Add Screaming Frog for technical insights.
Pro Tip: Export all this data to spreadsheets. Screenshots can disappear, but spreadsheets stay forever.
c. Why Does This Matter?
Many businesses skip this step and regret it later. Without baseline data, you can't tell if your website redesign worked or failed.
Document your top 20 performing pages. These need special protection during the redesign process.
Red Flag Warning: If you can't access this data, set up tracking tools immediately. Wait 30 days to collect baseline data before starting your redesign.
Your baseline data guides every decision in the remaining steps of this site redesign seo checklist.
Step 3: Map Your Keywords and Content
Now that you’ve captured your baseline data, it’s time to turn insights into action by mapping your keywords and content. This process ensures that your redesigned website not only maintains its current visibility but also strengthens long-term SEO performance. Start with your top-performing pages and preserve the keywords and optimizations already driving traffic and leads. Then, expand into keyword clusters to cover related terms, address content gaps your competitors are ranking for, and align each keyword with user intent—whether informational, navigational, or transactional. By creating this blueprint, you ensure that every page in your redesign has a clear purpose, targeted keywords, and optimized content, setting the foundation for stronger rankings, higher engagement, and better conversions post-launch.

a. Create Your Content Map
Before you redesign, you need a clear plan for every page on your site. A content map gives structure and ensures no valuable pages are lost during the process.
Take your spreadsheet from Step 2 and add these columns:
- Main keyword for each page
- Secondary keywords
- Content action needed
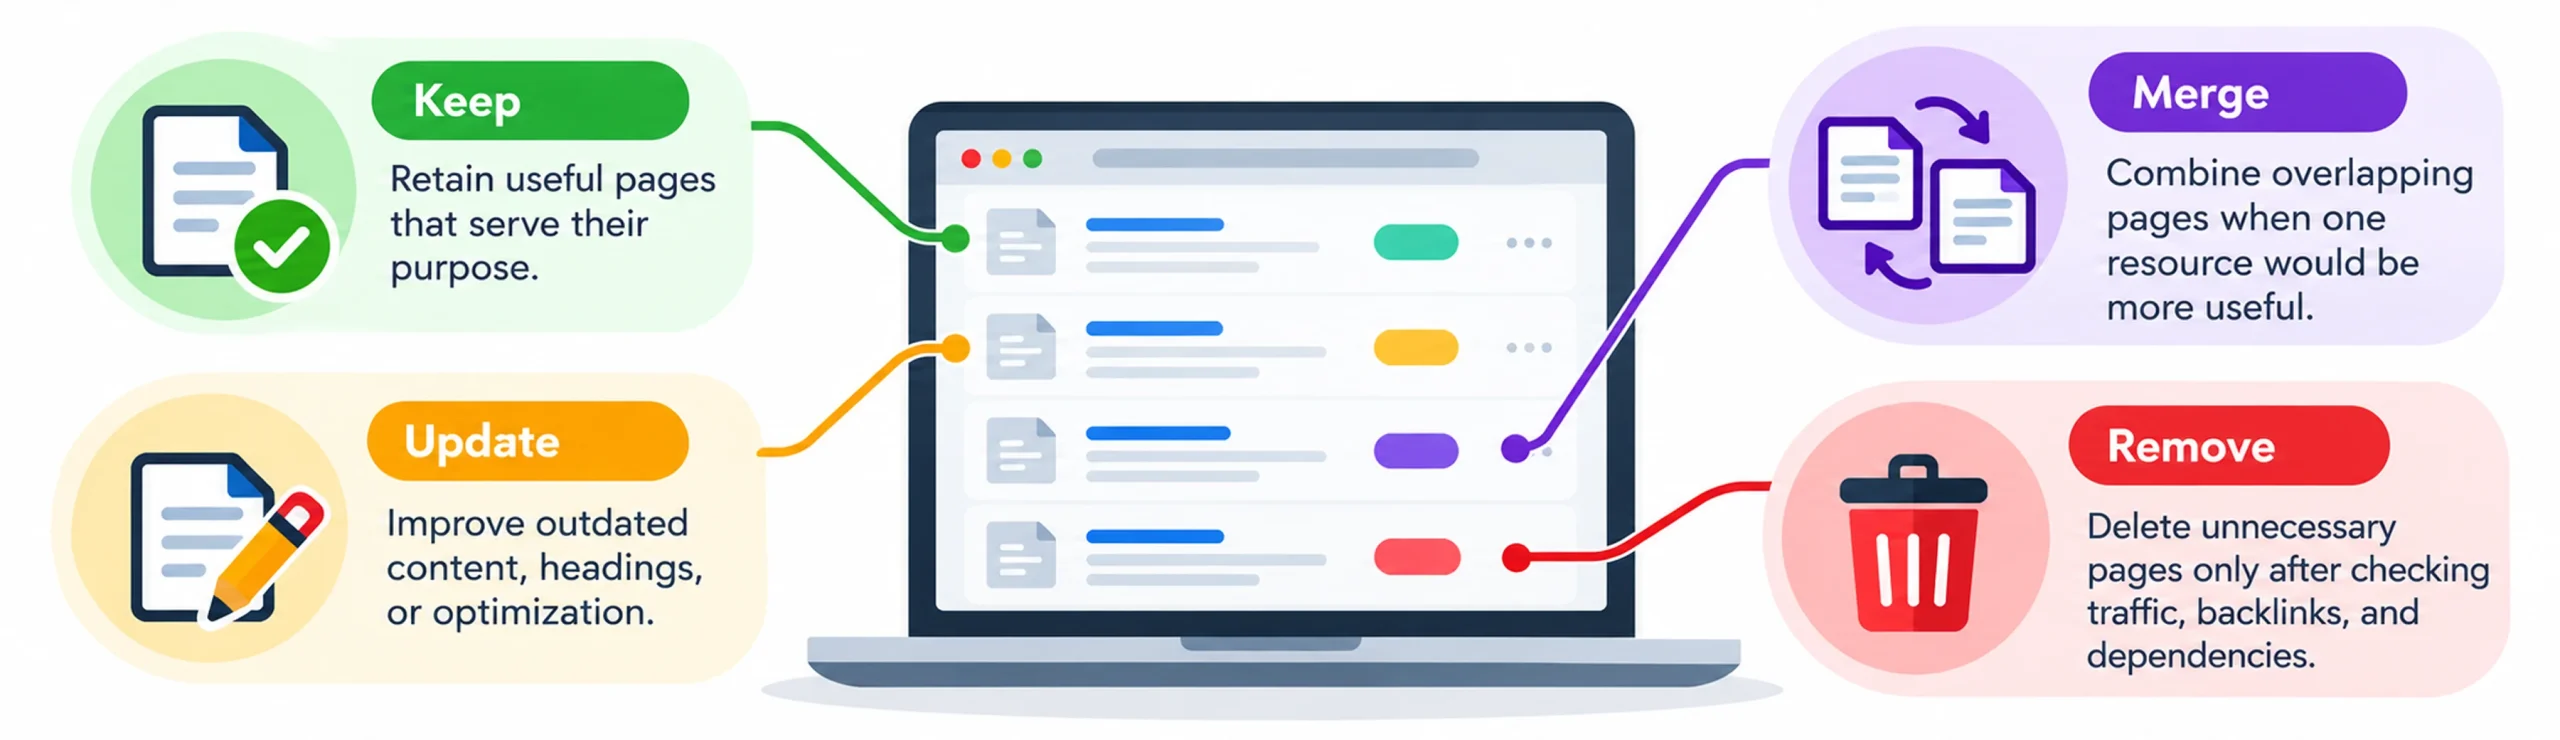
Assign Actions Based on Performance:
- Keep: Pages with strong traffic and conversions
- Improve: Pages with decent traffic but poor conversions
- Merge: Multiple pages targeting the same keywords
- Remove: Pages with no traffic or value
Group by User Intent:
- Information pages: How-to guides and tutorials
- Service pages: What you offer
- Contact pages: Ways to reach you
b. Avoid Keyword Conflicts
Your baseline data will show if multiple pages compete for the same keywords. This confuses search engines and hurts your rankings.
Fix this by merging similar pages or assigning unique keywords to each page.
Pro Tip: Focus on your top 20-30 pages first. These drive most of your results.
This content mapping step ensures each page has a defined purpose, unique keyword targeting, and a role in your website redesign SEO strategy. Skipping it leads to duplicate content, wasted effort, and a redesign with no clear direction.
Step 4: Plan Your Site Architecture and Navigation
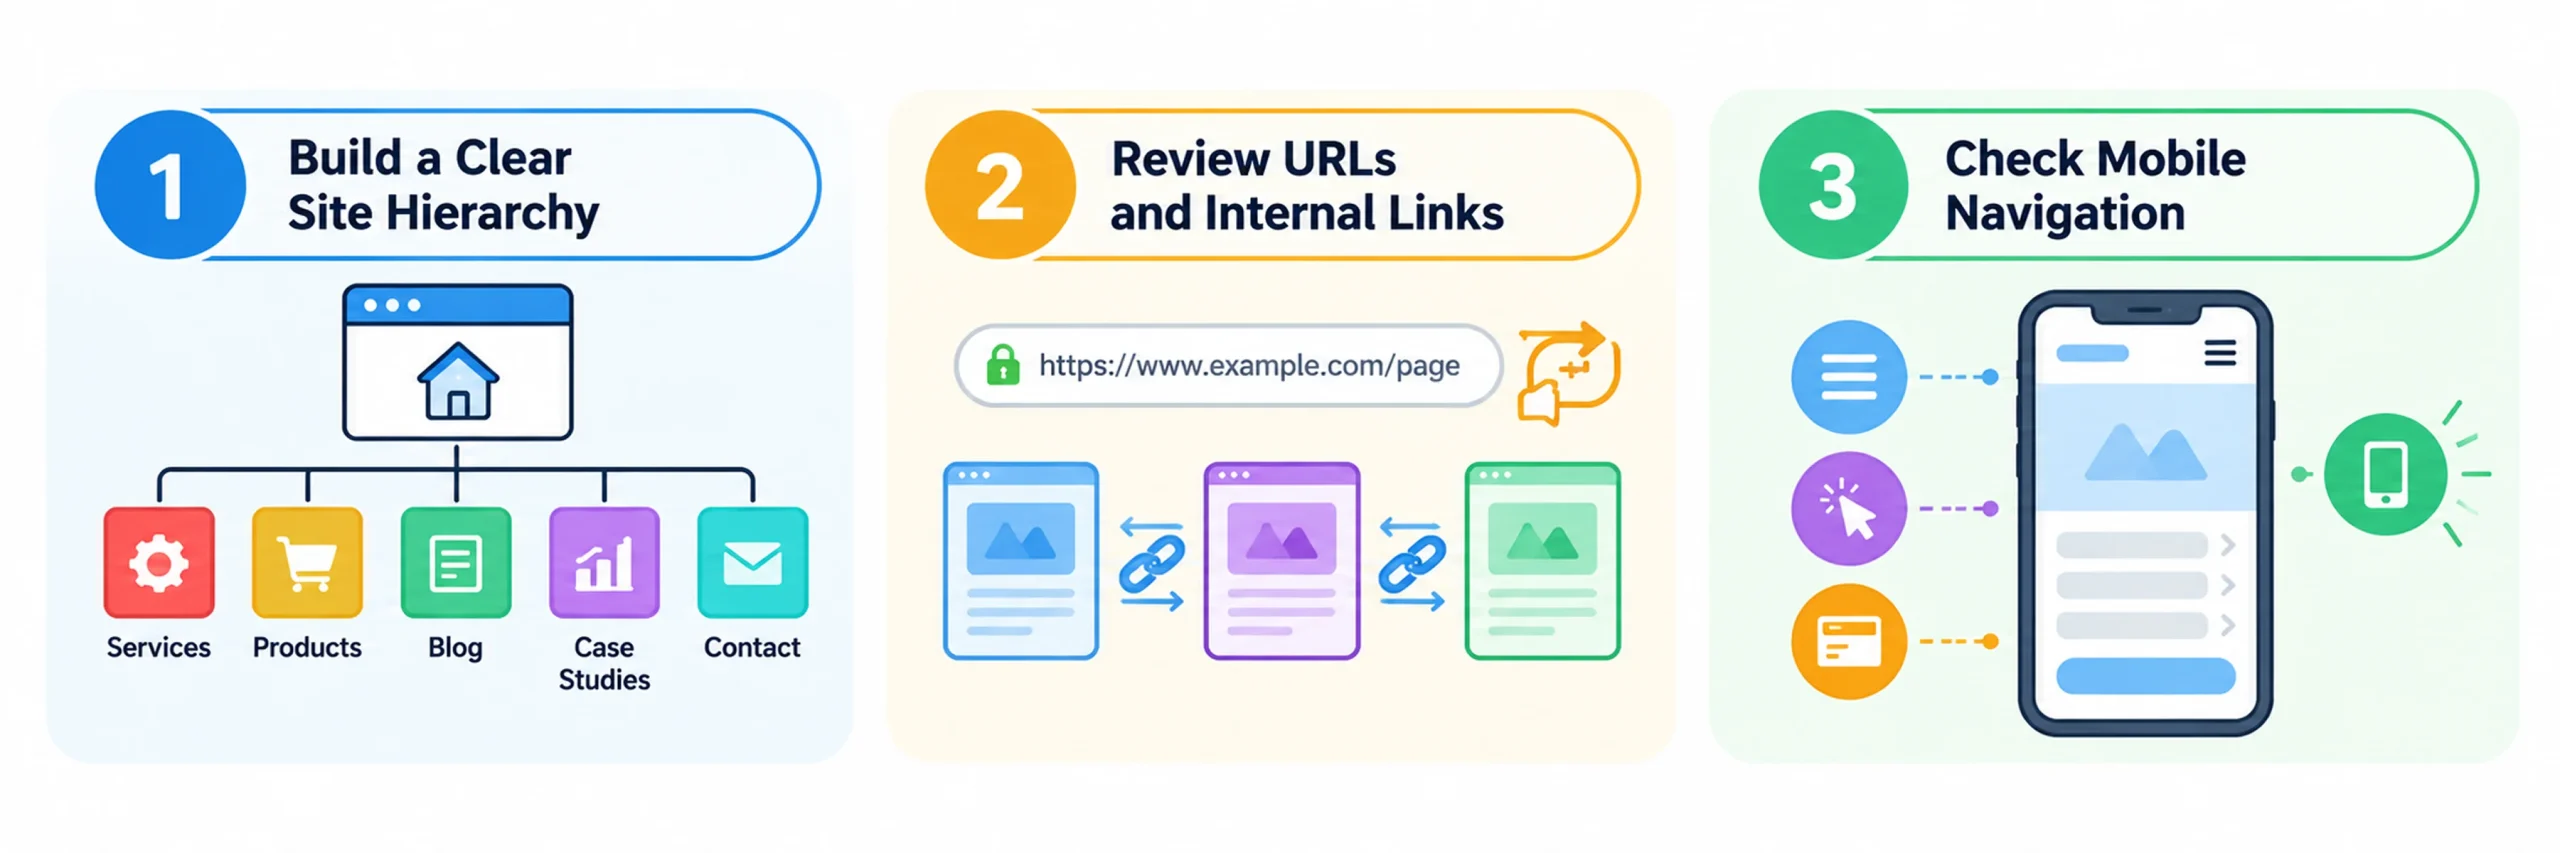
Your site architecture is the backbone of your redesign, and a clear structure is essential for both usability and SEO. A well-planned layout helps visitors find information easily, improves crawlability for search engines, and boosts rankings. Use your content and keyword map from Step 3 to design a logical hierarchy, group related topics, and keep important pages within a few clicks of the homepage. Ensure navigation is simple, mobile-friendly, and supported by strong internal linking. At this stage, planning URLs and redirects is critical to avoid losing SEO value and to set the foundation for long-term growth.

a. Build Your Site Hierarchy
Start with your high-performing pages from Step 3. These should be easily accessible from your main navigation.
Organize pages into logical groups:
- Main services (2-3 clicks from homepage)
- Information content (blog, guides, FAQs)
- Business pages (about, contact, testimonials)
b. Plan SEO-Friendly URLs
Use your keyword mapping to create clean URL structures:
- /web-design-services/ instead of /page1/
- /seo-tips/ instead of /blog/post123/
Keep URLs short and descriptive. This helps your website redesign seo performance.
c. Internal Linking Strategy
Connect related pages naturally. If you have a service page, link to related blog posts and case studies.
This spreads SEO value across your site and keeps visitors engaged longer.
d. Navigation Best Practices
- Keep the main menu to 5-7 items maximum
- Use clear, descriptive labels
- Add breadcrumbs for deeper pages
- Include search functionality
e. Mobile-First Planning
Most of your visitors will explore your site on a phone, so design navigation with mobile in mind first.
Pro Tip: Always create a visual sitemap before building. It prevents structural problems and ensures nothing important gets buried.
Why This Matters: Your site architecture impacts everything — from SEO rankings to user engagement to conversion rates. Get this foundation right, and your entire website redesign SEO checklist becomes easier to execute. It also makes planning for 301 redirects straightforward, protecting your hard-earned SEO value during the migration.
Step 5: Create a 301 Redirects Implementation Plan
Based on your new site architecture, the next critical task is mapping every single URL change with a proper 301 redirects plan. This ensures users and search engines seamlessly reach the right pages, preserving authority and preventing errors. It’s one of the most important steps in redesigning a website without losing SEO, because without it you risk broken links, traffic drops, and lost rankings. A well-prepared redirect map safeguards your existing SEO value and ensures a smooth transition after launch, while also enhancing overall site usability.

a. Why 301 Redirects Matter?
When you change or delete URLs, search engines lose track of your pages. A 301 redirect works like a forwarding address — it tells Google (and visitors) exactly where the content has moved. Without them, all the authority your pages built up disappears, and your site can experience a sudden drop in visibility.
b. Create Your Redirect Map
Use your old URL list from Step 2 and your new structure from Step 4. Build a spreadsheet with these columns:
Build a spreadsheet with these columns:
- Old URL (current page address)
- New URL (where it's moving)
- Traffic level (high/medium/low priority)
- Status (ready/pending/complete)
Redirect Rules:
- One old URL = One new URL (no chains)
- Match content closely (redirect blog posts to related blog posts)
- High-traffic pages get priority attention
- Remove broken or outdated pages entirely
Common Redirect Scenarios:
- Homepage stays the same: No redirect needed
- Service pages move: /old-service/ → /services/new-service/
- Blog posts relocate: /blog/old-post/ → /insights/new-post/
c. Testing Your Redirects
Before launch, test every redirect manually. Tools like Screaming Frog can quickly identify errors or redirect loops.
Pro Tip: Set up redirects in batches, starting with your top 20 pages first. This ensures your highest-value content is protected right away.
Why This Matters: 301 redirects are your insurance policy during a redesign. They protect your hard-earned SEO, maintain organic traffic, and ensure a seamless experience for returning visitors. Get this step wrong, and the consequences can be permanent, but when done right, it keeps your SEO equity intact and makes your relaunch far smoother.
Step 6: Optimize Technical SEO Elements (Including XML Sitemap Updates)
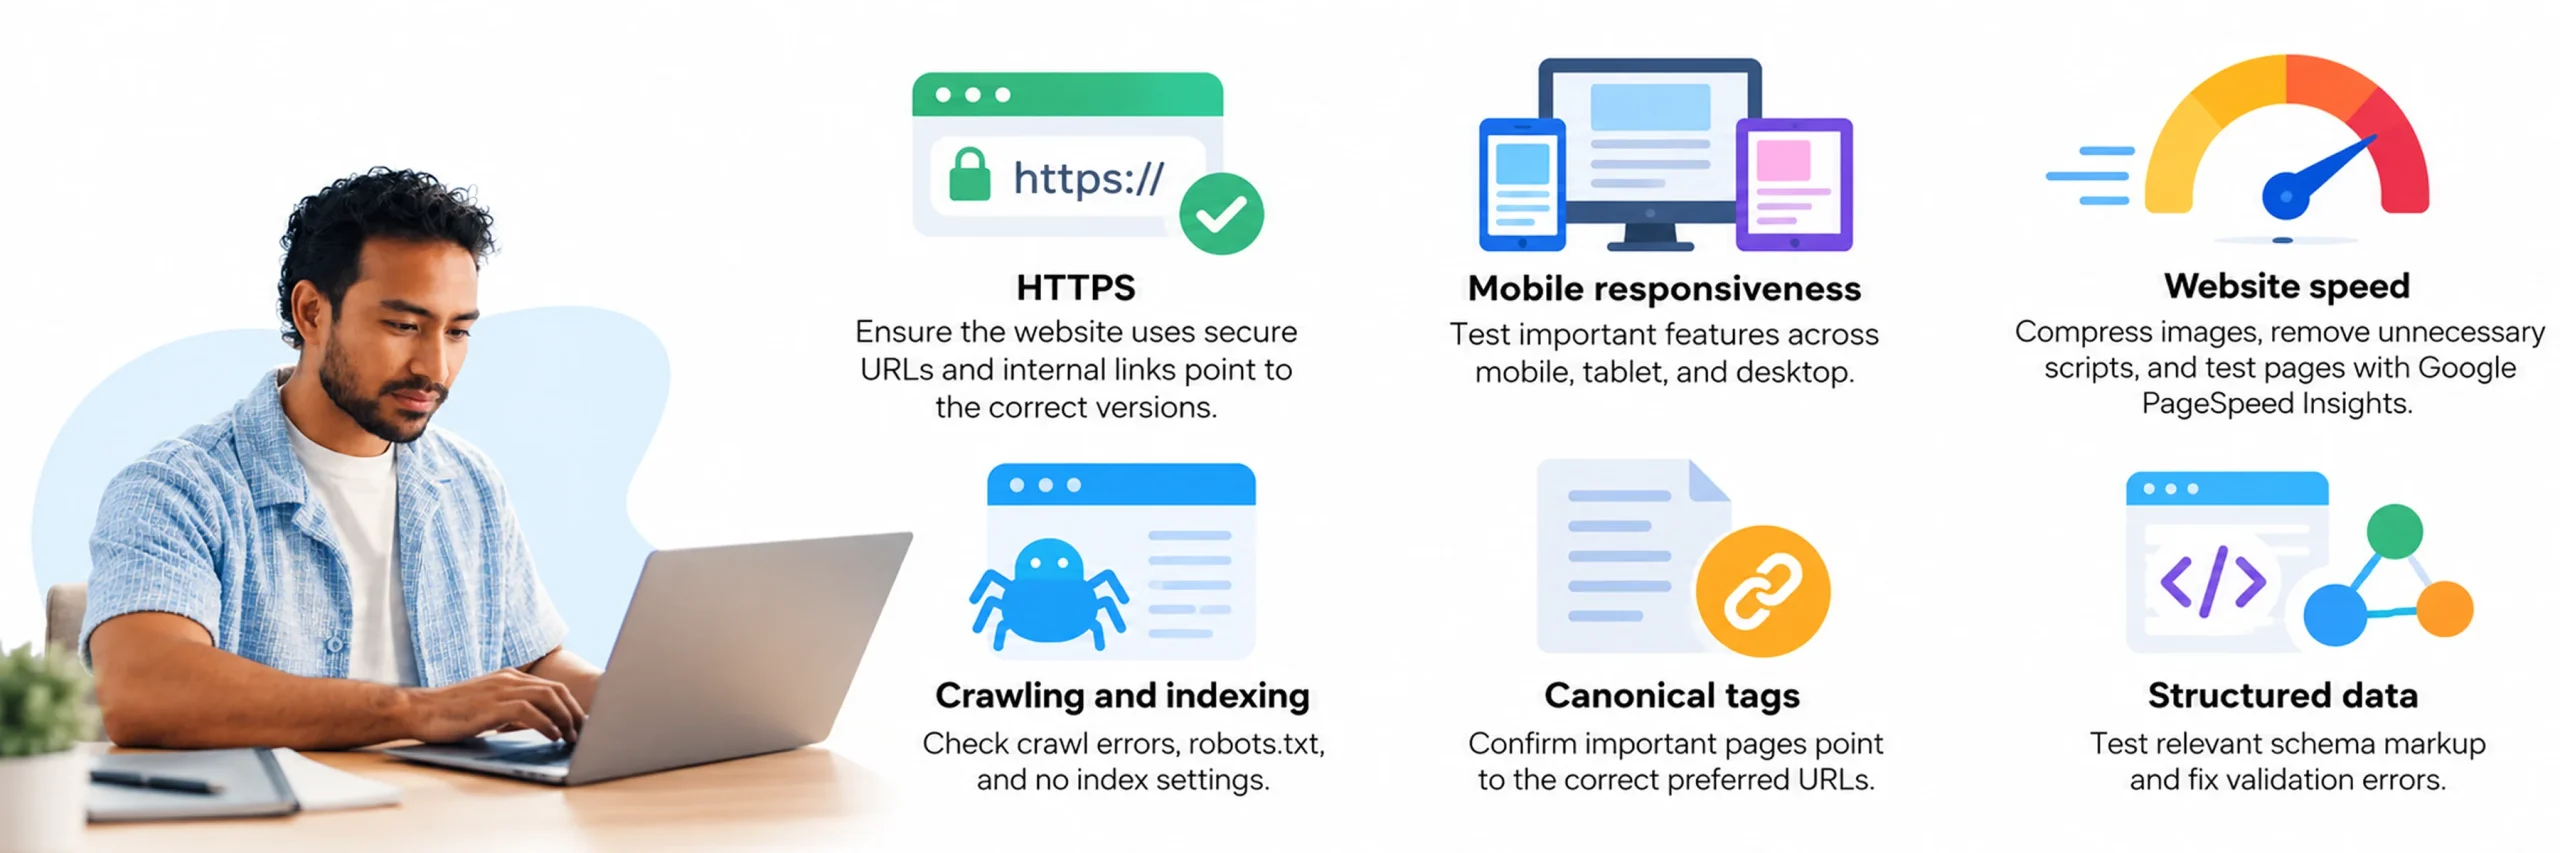
Technical SEO is the backbone of your website redesign, ensuring search engines can crawl, understand, and index your site effectively. Without a strong technical foundation, even the best content and design won’t perform in search. This step includes reviewing and updating your XML sitemap, fixing crawl errors, optimizing site speed, and ensuring mobile responsiveness. Think of it as reinforcing the “engine” that powers all your content and UX improvements, making sure your redesign is both user-friendly and search-engine ready.

a. Core Technical Optimizations
Focus on improving site performance, security, and crawlability:
- Compress images and clean up code for faster loading
- Make your site mobile-friendly with responsive design
- Use clean, keyword-rich URLs
- Secure your website with HTTPS
- Fix crawl errors in Google Search Console
- Minify CSS, JavaScript, and HTML files
- Use a Content Delivery Network (CDN)
- Set up proper caching
b. XML Sitemap Updates
Update your XML sitemap to reflect your new site structure. Remove old URLs and add new ones from your redesign.
Submit the updated XML sitemap to Google Search Console and Bing Webmaster Tools right after launch.
Structured Data: Add schema markup to help search engines understand your content better. This can improve how your pages appear in search results.
c. Why Does This Matter?
Without solid technical foundations, even great content struggles to rank well. These optimizations help search engines crawl and index your site effectively.
Pro Tip: Test your site speed with Google PageSpeed Insights before going live. Aim for scores above 90.
Technical SEO supports every other element in your website redesign seo checklist. Get these basics right, and your website relaunch seo checklist has a strong foundation for success.
Step 7: Implement On-Page SEO During Development
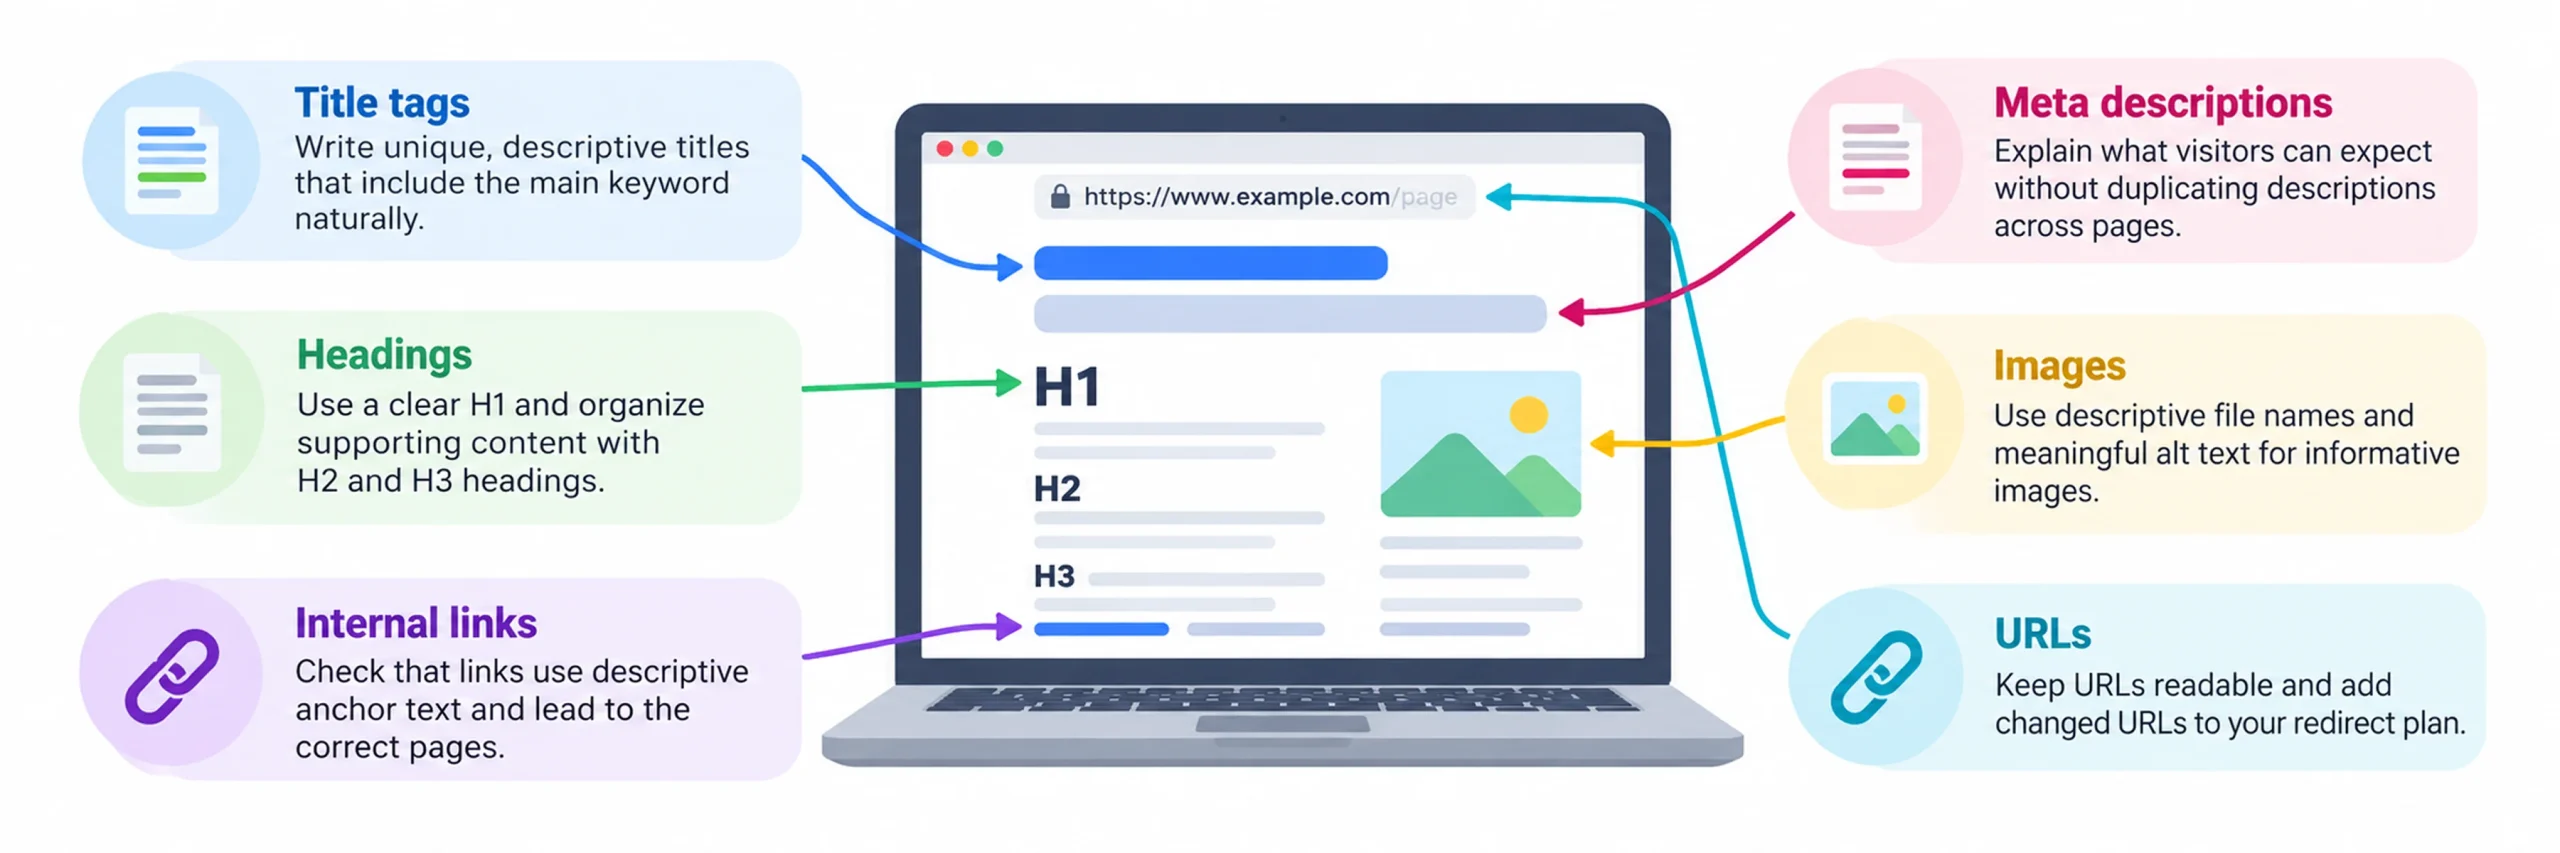
On-Page SEO isn’t something you “fix later.” It should be integrated during the development phase to ensure every page of your redesigned site is optimized from the start. By embedding SEO directly into page elements—such as titles, meta descriptions, headers, internal links, and image alt text—you avoid costly rework and give your content the best chance to perform from day one. This proactive approach not only improves launch-day visibility but also creates a consistent SEO framework that supports long-term growth. Paying attention to On-Page SEO early also helps align your content with user intent, driving better engagement and conversions.

a. Key On-Page SEO Areas to Optimize
Every page element is an opportunity to boost visibility. By fine-tuning titles, content, and structure during development, you ensure your redesigned site is both search-friendly and user-focused.
i. Title Tag Optimization:
Write unique, compelling title tags for each page using your primary keywords from Step 3. Keep titles under 60 characters and make them click-worthy for users, not just search engines.
ii. Meta Description Creation
Craft clear meta descriptions that include your target keywords and encourage clicks. Aim for 150-160 characters and write them like mini-advertisements for your page content.
iii. Header Structure
Use your H1 tag for the main page keyword and organize content with H2 and H3 tags that include related keywords naturally. This helps both users and search engines understand your content hierarchy.
iv. Image Optimization
Add descriptive alt text to every image using relevant keywords where appropriate. Rename image files from generic names like "IMG_001.jpg" to descriptive names like "web-design-services-consultation.jpg."
v. URL Optimization
Ensure your new URLs are clean, descriptive, and include target keywords. Avoid generic parameters and keep URLs short and readable.
vi. Internal Linking
Build strategic internal links between related pages using keyword-rich anchor text. This helps distribute SEO value throughout your site and keeps visitors engaged.
vii. Content Optimization
Incorporate keywords naturally throughout your content while maintaining readability. Focus on user intent rather than keyword density.
Pro Tip: Provide your development team with an On-Page SEO checklist to ensure every page follows the same optimization standards.
Why This Step Matters: On-Page SEO during development ensures your redesigned site launches fully optimized, rather than requiring fixes after going live. It embeds SEO into the foundation of your website redesign SEO checklist, giving you a competitive advantage from day one.
Step 8: Balance User Experience with SEO Requirements
A great redesign succeeds when design and SEO work together. A site that looks visually stunning but loads slowly or confuses visitors won’t deliver results, just as SEO that drives traffic won’t matter if users abandon the site right away. The goal here is to strike a balance where design choices enhance user experience without sacrificing technical performance or search visibility. This means prioritizing fast load times, mobile responsiveness, intuitive navigation, and clear calls-to-action, while also ensuring pages are optimized with proper tags, structured content, and keyword relevance. This step focuses on creating harmony between SEO and website redesign so that both search engines and real users are satisfied, ultimately leading to higher engagement and stronger business outcomes.

a. Key Balance Areas To Work
Content Strategy:
- Write clear, helpful content that answers user questions
- Use headings with relevant keywords naturally
- Break content into short, scannable sections
- Include clear calls-to-action on every page
Navigation Design:
- Keep main menus simple (5-7 items maximum)
- Use descriptive menu labels instead of creative names
- Add breadcrumbs for deeper pages
- Ensure mobile navigation works with thumbs
Performance Optimization:
- Fast loading speeds improve both UX and SEO rankings
- Optimize images without sacrificing visual quality
- Use a mobile-first responsive design
- Test across different devices and browsers
Accessibility Features:
- Add alt text to images for screen readers
- Use proper color contrast for readability
- Ensure keyboard navigation works
- Include skip-to-content links
b. Why Does Balance Matter?
Google's ranking algorithm considers user behavior signals like bounce rate and time on page. A site that looks great but frustrates users will struggle in search results.
Pro Tip: Conduct user testing sessions before launch. Watch real people navigate your redesigned site to catch usability issues early.
This balance ensures your website redesign seo checklist creates a site that both ranks well and converts visitors into customers.
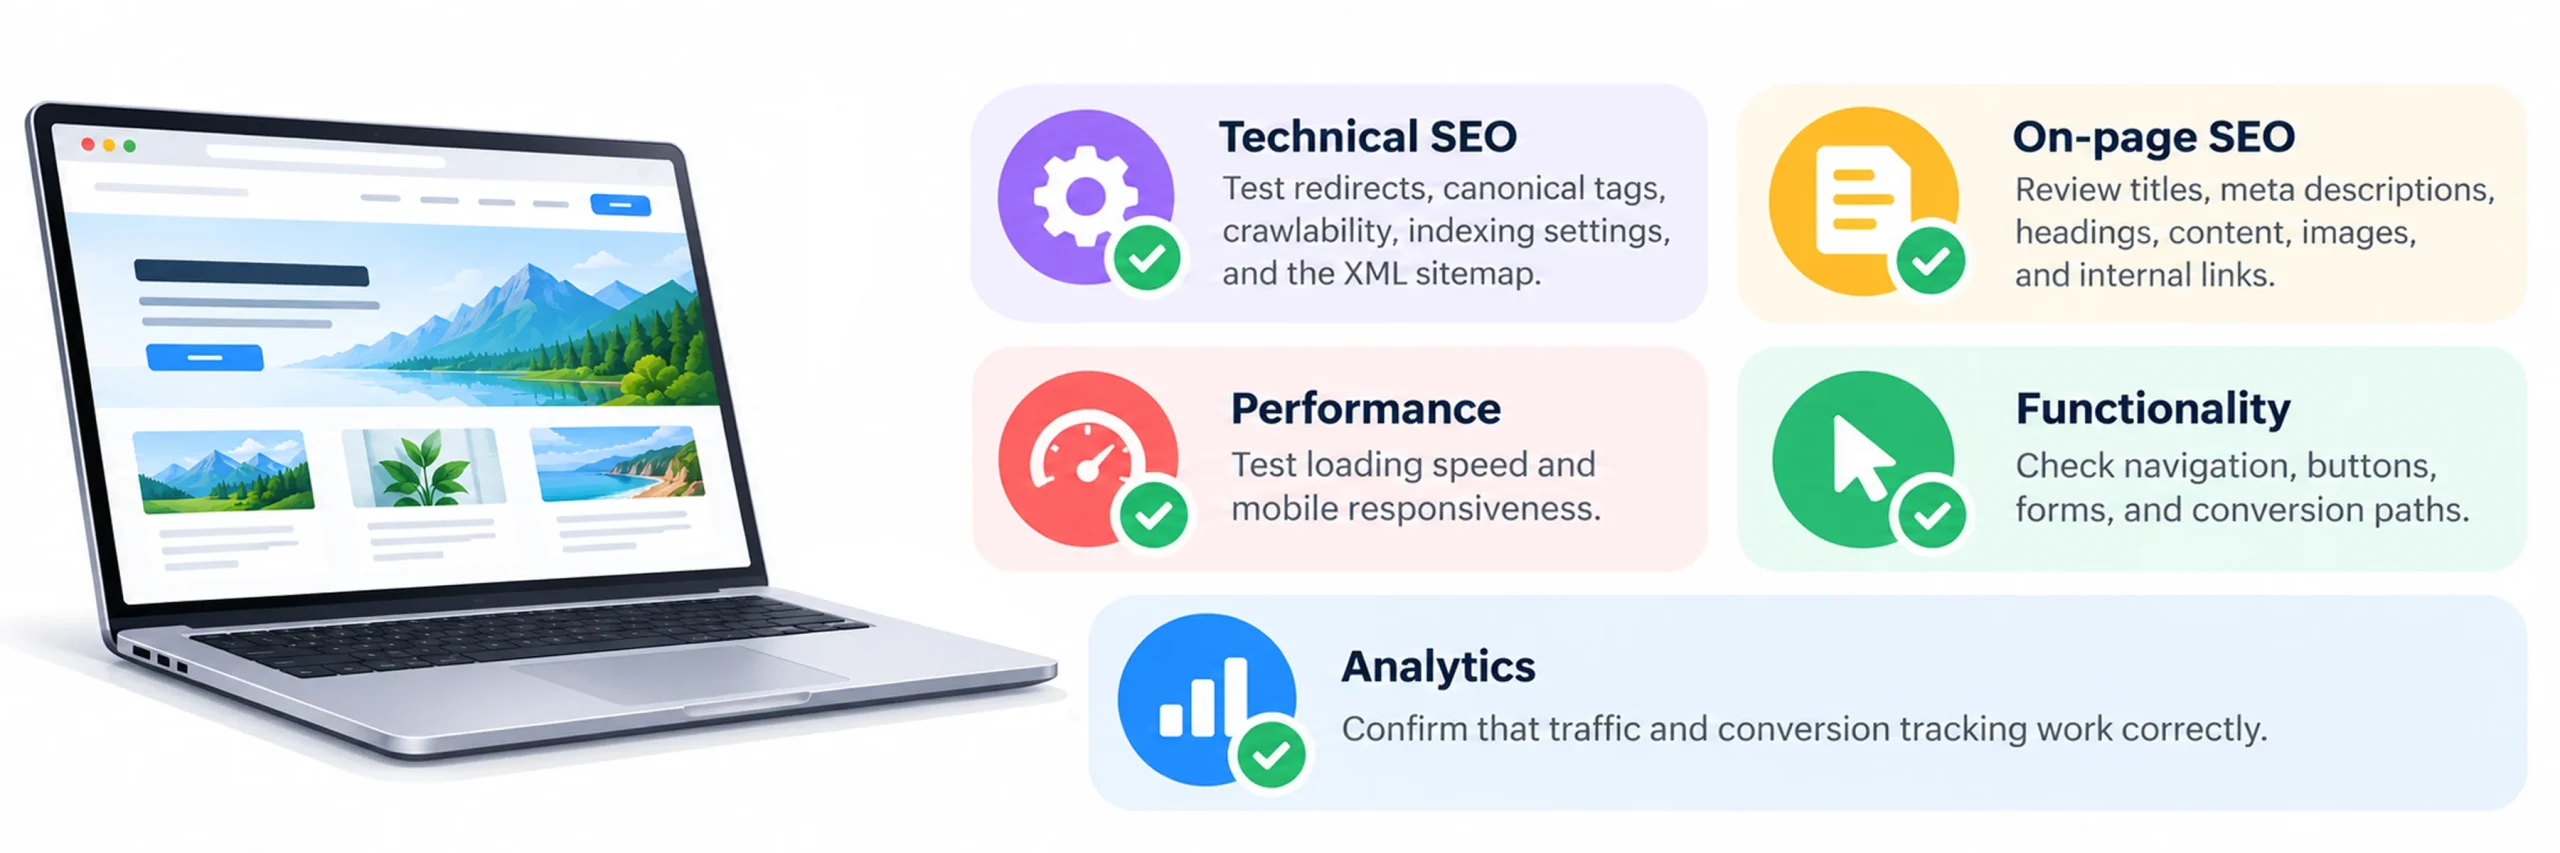
Step 9: Execute Pre-Launch SEO & 301 Redirects Testing
After implementing your UX improvements, it's time for the final testing phase. This critical step ensures everything works perfectly before launch and protects your website redesign for seo investment.
Now comes the moment of truth. Run a complete site crawl using Screaming Frog to identify any lingering issues. This tool will catch broken links, missing images, and crawl errors that could hurt your rankings.
Test every single redirect from your Step 5 mapping. Make sure old URLs properly send visitors to their new destinations. Check for redirect chains where one page redirects to another, which then redirects again. These slow down your site and confuse search engines.
Your XML sitemap also needs updating. Generate a fresh sitemap with all your new URLs and submit it to Google Search Console and Bing Webmaster Tools. Remove any outdated URLs that no longer exist on your site.
Performance testing is crucial at this stage. Use Google PageSpeed Insights to check loading speeds on both desktop and mobile. Aim for scores above 90 to ensure fast user experiences.
Don't forget cross-browser testing. Your site should look and work perfectly on Chrome, Firefox, Safari, and Edge. What works on one browser might break on another.
Give your content one final review. Scan for placeholder text, spelling errors, and incomplete sections that slipped through earlier reviews.
Pro Tip: Set up a staging environment that mirrors your live site exactly. Test everything there before making any changes to your live website.
This thorough testing prevents the most common website redesign seo checklist failures and ensures your website relaunch seo checklist delivers the results you planned for.

Step 10: Launch Checklist and Ongoing XML Sitemap & Performance Monitoring
Once your testing is complete, it’s now time for the big moment—launch day. A successful launch requires careful execution, from deploying your final design to double-checking redirects, metadata, and analytics tracking. But the work doesn’t stop there. Immediate follow-up is essential to monitor how search engines are crawling your updated site, which makes updating and submitting your XML sitemap a critical task. Ongoing performance monitoring—tracking rankings, traffic, site speed, and technical health—ensures your website redesign SEO investment continues to deliver results long after the initial launch.

a. Immediate Launch Actions:
Submit your updated XML sitemap to Google Search Console and Bing Webmaster Tools right after going live. This tells search engines about your new site structure and helps them discover your updated content faster.
b. First 48 Hours Monitoring
Watch your website closely during the first two days after launch. Check for unexpected errors, broken links, or functionality issues that might have slipped through testing.
Keep Google Analytics and Search Console open to monitor for traffic drops or crawl errors that need immediate attention.
c. Redirect Verification
Test your 301 redirects in the live environment. Check several old URLs manually to ensure they properly send visitors to your new pages without breaking their experience.
d. Technical Checks
Review your robots.txt file to confirm it's not accidentally blocking important pages from search engines. A misconfigured robots.txt can immediately hurt your search visibility.
Check your website's loading speed on the live server using Google PageSpeed Insights. Performance sometimes changes when moving from staging to production.
e. Ongoing Monitoring Setup
Create Google Analytics annotations marking your launch date. This helps you track the redesign's impact on traffic and performance over the coming weeks.
Monitor key metrics like organic traffic, bounce rates, conversion rates, and keyword rankings. Compare these to your baseline data from Step 2 to measure success.
f. Timeline Expectations
Be patient with SEO results. Search engines need time to crawl and index your new site structure. Full SEO benefits often take 4-8 weeks to appear, but consistent monitoring helps you catch and fix issues quickly.
Pro Tip: Schedule daily check-ins for the first week, then weekly reviews for the first month to ensure your website relaunch seo checklist delivers the expected results.
Conclusion
Redesigning your website without losing SEO rankings requires careful planning and execution. This website redesign seo checklist provides a roadmap to protect your search visibility while improving performance. Remember, SEO improvements take time, so be patient with results.
Managing this complex process can be overwhelming for businesses. At JanBask Digital Design, we specialize in seo and website redesign projects that preserve rankings while delivering modern, high-performing websites. Our team understands the delicate balance between aesthetics and technical requirements.
Ready to redesign your website the smart way? Let JanBask Digital Design guide you through every step of your SEO-safe transformation.
Secure Your Website Relaunch with this Checklist!
- Enhanced User Experience
- Better Conversion Rates
- Boost Organic Traffic