

Worldwide eCommerce sales have surpassed $5.5 trillion and are continuing to grow rapidly, showing how increasingly profitable this space has become for businesses globally.
The path to launching an eCommerce business has never been easier. With a wide range of platforms and tools available, setting up an online store takes just a few clicks. One of the most popular and adaptable platforms for building an online store is WordPress.

Today, we'll focus on using WordPress to create an online store, which is one of the most popular and adaptable e-commerce solutions.
In the beginning, WordPress was just a blogging platform, but it has since evolved into a powerful website-building tool that can create any type of eCommerce store.
WordPress is the most popular platform for creating an online store. We'll go over everything you need to know to get your store listed on the most popular eCommerce platform on the web. You won't have to touch a line of code to get your store up and running. After you finish this tutorial, you will have a fully functional WordPress eCommerce store.
WordPress is the most widely used content management system on the Internet, and it combines simplicity of use with plugin-based modularity, allowing it to be applied to even the most basic websites.
WordPress' open-source, community-managed nature ensures that it is constantly updated with new features and security patches.
WordPress is a great platform for building an e-commerce website because it has a wide variety of pre-built themes that are specifically designed for this purpose. There are also plug-ins that allow a site to become fully functional as an online store.
To sum it all up, WordPress is an excellent choice because of its flexibility, which allows you complete control over your website's functionality and appearance. It's possible to add a blog, forums, and other pages to your website in addition to your storefront.
All of this is available for free as long as you continue to use the WordPress platform. Hosting and domain registration fees are the only costs you'll incur on a monthly basis, while WordPress itself is free to use.
We'll walk you through the steps of building an eCommerce website with WordPress in the sections that follow.
Want to build an eCommerce Website with WordPress?

Now that you have a basic understanding of how WordPress for eCommerce works, let's get into the full step-by-step instructions.
You will need a domain name and web hosting service to create an eCommerce website in WordPress. Your domain name is essentially your website's URL. It's the part of your URL that follows the "www." prefix.
A good rule of thumb is to keep your domain name short and as close to your company's name as possible.

You can purchase a domain name from a number of different vendors. If you're lucky, you'll be able to find the one you want for free and at the standard low price of $10 to $20 per year. But sometimes, there is a chance that your desired domain name may be taken, or it may be available for resale at a much higher price, costing you hundreds or even thousands of dollars. But the good news is that even the most expensive domain names can be renewed at the standard rate of $10 to $20 per year after that.
The next step in how to make a WordPress eCommerce website is to find a hosting provider now that you have your domain name. Hosting is required for every website. It's like renting a plot of land on the internet, but with more room for expansion! As far as choosing the best hosting provider and the type of hosting you need, think about the type of store you're building.
Now that you've secured your domain and hosting, you can begin the process of installing WordPress. There are two ways to go about it:
A single Click Setup
Choosing the first option is the simplest, so that's what we suggest. Simply go into your hosting dashboard and click the "Install WordPress" button once you've signed up with a host that offers this type of installation.
Using the one-click install, you can register a domain name and have WordPress hosted by the same company. PHP 7, MySQL v5.6+ or MariaDB v10.0+, and HTTPS are all recommended by WordPress for your web host.
Alternatively, you can choose a hosting provider that is already supported by WordPress, which will make the process of installing and maintaining your site a lot easier.
Manual Installation
You must download WordPress to your computer, then upload it to your hosting dashboard if your hosting provider does not offer one-click WordPress installation. However, it's not quite as simple as you might think.
The manual option requires you to set up a server, then install and configure the WordPress platform on that server. There are a few things you'll need: an FTP client, a database, and access to your web server to get started. As a result, this option is best suited for more experienced users.
The ability to sell products directly from an eCommerce WordPress website distinguishes it from a standard WordPress website. You'll need to install an eCommerce plugin because WordPress doesn't have any built-in eCommerce website features.
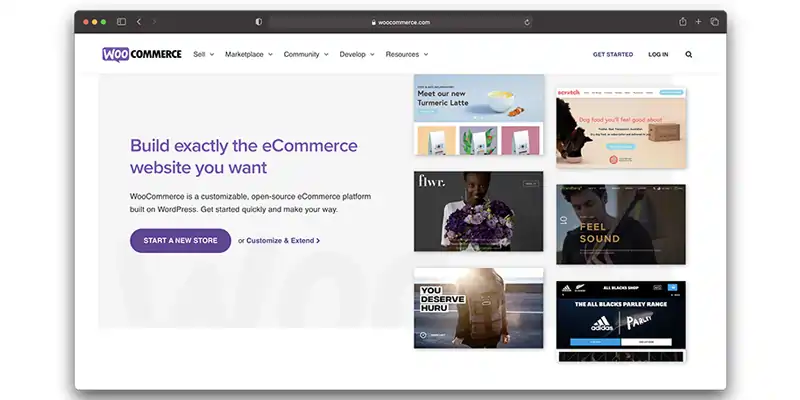
With WooCommerce, you can easily add e-commerce capabilities to your WordPress site. More than 3,000 users have given it a 4.6/5 star rating, and it currently has over 4 million active installations. According to the numbers, it's safe to say that it's a big hit.
You can get started for free. Developed by a global network of volunteers, WooCommerce is an open-source shopping cart system similar to WordPress. Although you may have to pay for some extensions, it is possible to turn your website into an online shop for free.
Among these are:
The next step in how to add eCommerce to WordPress is to learn how to use the WooCommerce extension. Check out these steps:
#1 Go to the Plugins section of your WordPress dashboard and click on Add New.
#2 Using the search bar at the top right of your screen, type in 'WooCommerce'.
#3 Next to the plugin, click on the Install Now button. A few seconds later, this button will turn blue and read Activate. To do so, simply click on it.
When WooCommerce has been installed, you'll be greeted by the on-screen launch/setup wizard. As expected, it's a cinch to complete and only takes a few minutes.
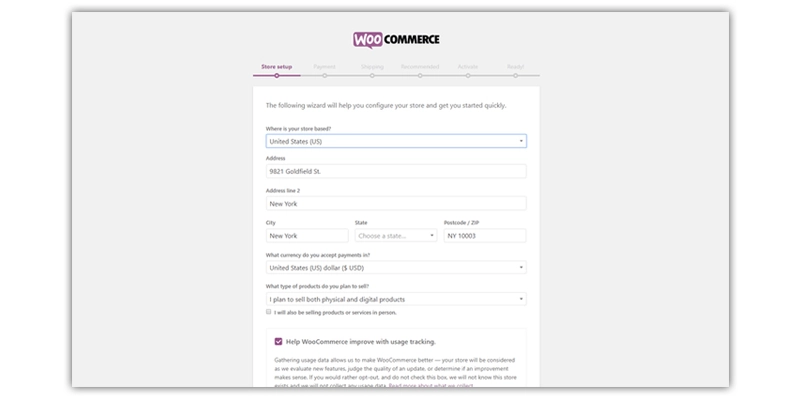
As a starting point, you'll need to fill out your company's information. Choose the option under 'I intend to sell both physical and digital products.'
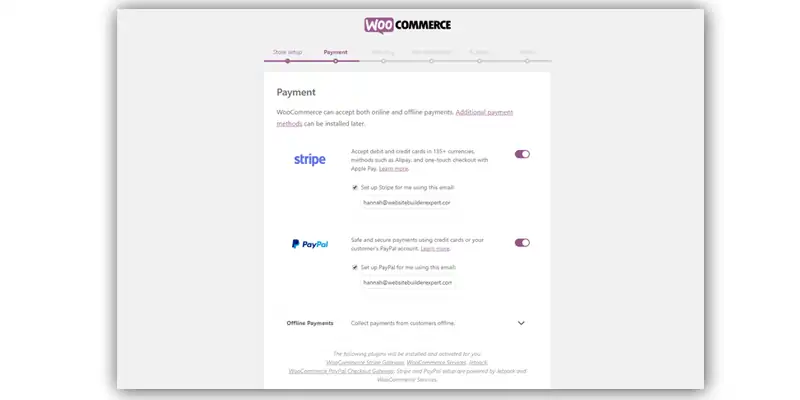
Selecting the payment methods that your store will accept is the next step. It's a good idea to enable both Stripe and PayPal, as they're both widely used payment methods. If you haven't set up your accounts yet, you can do so at a later time.

The next step is to select your shipping costs. As soon as WooCommerce detects where you are, it will designate that area as your primary shipping zone. You can also go for eCommerce website design services if you are doubtful about the whole process.
Your 'theme' will serve as the framework for all of your website's design. WordPress is a great platform because it allows you to completely change the look and feel of your website by simply editing or adding HTML code.
It is your theme that determines how your website content appears to your visitors, so choose wisely. Since WordPress themes can be changed and customized at any time, it gives your store a distinctive look that makes it stand out from the competition.
If you're a coding expert, you can use the customization option. It's better to go with a pre-made theme that most closely matches your vision if this is not you.
Step #1 Go to your WordPress dashboard and select Appearance and then Themes from the drop-down menu.
Step #2 Use the Add New button to look through the available themes. It's also possible to test out a few to see how your store will look.
Step #3 Install the theme of your choice by clicking on the Install button. A few seconds later, the button will read Activate, and you can begin using it. It's all yours if you choose it.
How to Setup a Premium Theme?
Step #1 Choose a theme and save it as a .zip file.
Step #2 Go to Appearance and Themes in your WordPress dashboard.
Step #3 A new window will pop up where you can choose a new theme from the WordPress Theme Directory.
Step #4 Click on the Upload theme. After the prompt, select the.zip file on your computer to open it.
After you receive a Success message, look for a link to activate your theme.
You now have a fully operational store. Make sure your theme has a look and feel that complements your brand identity. While most eCommerce features can be added by means of plugins rather than your theme, it's still important to check for basic functionality, such as how the theme's product filters look and how easy it is for customers to search for items. Choosing a lightweight theme that won't slow down your store is critical to the performance and load times of your store. We have compiled some effective examples of eCommerce website designs for you.
Now that your store looks like an eCommerce store, you're ready to start adding products.
To create a product, go to Products and Add New.
Fill out the product details here. Focus on the following areas for the best results:
These are the physical product types that can be used:
Simple: An easy product that has no SKUs
Grouped: The grouping of several child products
Variable: Products with multiple SKUs
External/Affiliate: Products that aren't sold in your store but are still affiliated with you
You can select one from the dropdown menu at the top of the product data box (e.g., a sweatshirt with multiple sizes). The tabs in the product data box can also be used to configure additional details, such as inventory, dimensions, weight, etc.
Repeat the process to add more products. You can also use a CSV file to import your products if you have a large number of them. As soon as you're satisfied, click the "Publish" button, and your product will be live.
Go to 'All Products' in the menu on the right to see everything you've published.
Plugins are absolutely essential to the expansion of your store's functionality. It's one of the best things about WordPress for eCommerce that there are so many plugins to choose from, both official and third-party.
In addition to WooCommerce, we recommend the following plugins for online stores:
This is how you add a plugin to your site:
Each plugin will have its own process for this, but the description of the plugin will have instructions on how to do it.
Many other plugins can be found to help with various aspects of your store to help you with the following:
Starting with a search for the specific features you need is the best way to get started. Make sure to read the reviews and check the developer's reputation. If you're concerned about the security and functionality of your store, consider installing plugins from trusted developers.
Payment is the final step in any eCommerce in WordPress setup, just as it is in the shopping process both online and offline. You'll need a way to accept payments from your customers if you're running an eCommerce website.
A payment gateway is an intermediary service that serves as a conduit for transactions between you and your customers.
When a customer completes a transaction on your site, they are redirected to the payment gateway's website, where they enter their financial information or log in to their account. The customer sends money to the payment gateway, which securely exchanges it before transferring the funds to your merchant account. Some payment gateways also offer the service of storing payment accounts.
An SSL certificate is required for most features of payment gateways. When you use this method, you can rest easy knowing that your customer's financial information is safe from prying eyes. In most cases, you can obtain an SSL certificate through your web host for a fee.
In addition to the above steps on how to create an eCommerce website with WordPress, here are some more tips for setting up eCommerce on WordPress.
In order to begin receiving customers; you should have a fully functional eCommerce site. If you want your store to succeed, you must make it load as quickly as possible. The speed at which your store fills will have a significant impact on the following:
If you've followed this guide, you're already well on your way to having a fast-loading store and a performance-optimized web host.
It's now time to make changes to the copy on your most important pages. A successful eCommerce store can be achieved by mastering the following elements:
It refers to the small bits of navigational and error messages on your site, as well as CTAs. Exactly what you write here is critical to the success of your website. Your website's navigational structure helps users navigate your site and provides reassurance and encouragement at critical junctures.
These should be clear and concise. If you were shopping for that product for yourself, think about what you'd want to know about it, especially things that aren't obvious from the product photos. Formatting and content should be consistent across products, so bullet points are a good idea.
Your site's success or failure can be determined by the quality of your product images. If you want the best results, invest in a high-quality camera and a plain background. Consistent product images and descriptions are essential to a well-designed website.
Prior to launching your website, WordPress will ask you to select an appropriate privacy policy page. Fortunately, you can use a pre-made template to get started. Simply go to 'Settings', then 'Privacy', and click 'Check out our guide'. Select the page you want from the drop-down menu under that once you've finished writing it up.
Make your site public once you're satisfied with how it functions. Remember, you can always 'Preview' pages to see how they would appear once live. Navigate to Settings, Then to Privacy. The option to make your site public will appear after you've added a privacy policy.
Now, you must have probably come to the conclusion that setting up a WordPress-based eCommerce site isn't that difficult. The information in this guide will guide you on how to make an eCommerce website and assist you in getting your eCommerce business off the ground and generating revenue.
Let’s summarize the steps on how to create a WordPress eCommerce website once again for you:
Make sure to keep your online store up-to-date with relevant and engaging content that leads to sales. Product descriptions can help you rank higher in organic search results as well, so make sure you optimize them!
Alternatively, if you're still in the planning stages of building an eCommerce for WordPress store, you'll know what to expect when you begin. Keep this guide on how to make an eCommerce website in WordPress handy for when you're ready to launch your store.


A Specialized Team for custom web solutions for your business through Web Design, Web Development, Digital Marketing Services such as SEO, Social Media Marketing.

B
It is a very helpful guide.
L
Thank you for sharing everything in detail.
C
How to protect the website against external threats?
J
For any query please contact info@janbaskdigitaldesign.com
M
Which theme would you suggest to start with?
J
It depends on your ecommerce business type, for more specific queries kindly contact info@janbaskdigitaldesign.com
H
What all plugins do you think are mandatory for an eCommerce website in addition to those mentioned in this blog?
J
Thanks for your feedback, for any query please contact info@janbaskdigitaldesign.com